A mechanical engineer became an active blogger, and it’s James Miller. Well, the journey of his blogging started more than a decade ago. As a...Read more
As a beginner, it’s perfectly fine if you are taking your bike to a local repair shop for simple maintenance. However, as you grow as a biker, you will find out yourself that some repairs can be done at home and without using any special tools. Changing the bike chain is one of them.
There are some simple rules – find out the master and chain link, remove both of them, replace the chain with a new one, clean up and attach the chain to the bike. This is the exact process of changing a bike chain without using any complex tool.
If you want to know in detail how to change a bike chain without a chain tool by yourself, too, you should keep reading till the end!
How to Change a Bike Chain Without Specialized Tools
Tools You Need
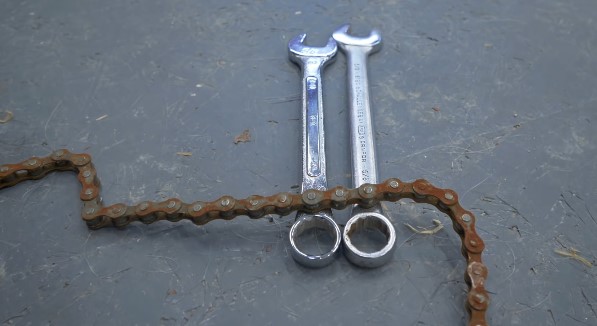
Using no special tool doesn’t mean using any tool at all. That’s why you will need a few simple household tools to change the bike chain. Here’s what you need.

1. Replacement Pin or Master Link: Cycle chains have a special pin that is usually referred to as a master link or special link. This is the only pin that connects the two ends of an entire chain.
If you have a master link from the previous chain that you are replacing, you don’t need a new one. However, going on with a new chain, you may want to have a new master link, as well.
2. Pliers: You need pliers to pull the chain apart from its place. Make sure you have the right size of pliers for this purpose.
3. Hammer and Nut: Yep, you may need to push it hard to take the links and chains off. The combo of a hammer and a nut will work perfectly in this case.
4. Gloves: Never take risks while working on repair and maintenance. Always wear protective gloves.
Part 01: Removing the Old Chain
The first step in replacing a bike chain is to remove the old one. Here is a step-by-step guide to doing it.

- Step 1: Use the pliers to get hold of the master link and push the pliers. It will loosen the master link from the plate of the chain.
- Step 2: Now, use the hammer and the nut to take off the cycle chain from the plate.
- Step 3: Hold the master link over the nut and make sure that the pinhole of the link is resting over the nut hole.
- Step 4: Now, hit the sharp edge of the pin with the hammer, and you will see the chain drop off easily from the plate.
Part 02: Installing the New Chain
The second part of replacing the chain is installing the new chain after taking the old chain off. Here’s how.

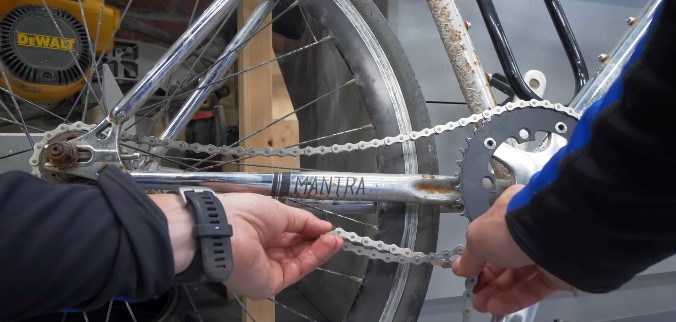
- Step 1: Take the new chain and put it around the chain wheel of your bike.
- Step 2: Fit the chain through the bike’s rear cassette and front derailleur.
- Step 3: Wrap the chain around the tiniest cog.
Part 03: Connecting the Chain
Finally, you need to reattach the chain to your bike to make it work. Follow this process.

- Step 1: First of all, ensure that the chain is totally dry and not greased or wet.
- Step 2: Use a curved pin to hold on to the disconnected chain. You need to hold tight and not let it lose.
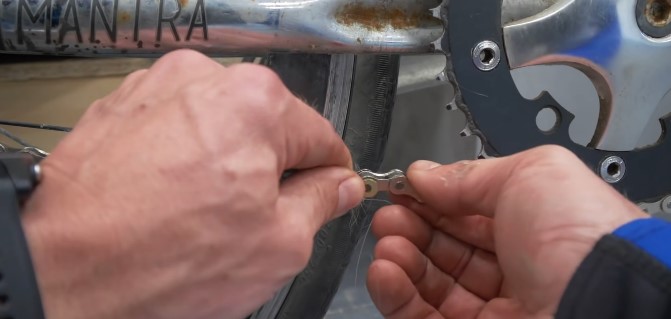
- Step 3: Weave both ends of the chain and put them together.
- Step 4: Place the new master link and attach the ends together. You can use the hammer to make it tighter if needed.
That’s it! You’ve done it! This is the way you change a bike chain without using expensive and special chain tools.
Identifying Master Link
Now, here’s a vital issue. How do you know what type of master link you need to use? Well, here are some tips to figure it out.
If the chain plates can be closed at any end, and you have only two plates in the entire link, this should be an SRAM-style link. An SRAM-style master link has two parts; both look exactly the same. Inside the chain plate hole, there should be a pin placed pretty well.
However, if the master link comes with three pieces instead of two, the master link should be a C-type one. So, if you are replacing the exact same type of bike chain, you need to make sure you are using the same master link, too.
What If I Don’t Have a Master Link?
So, what happens if you don’t see a master link? Well, in that case, you can still change the chain yourself. Follow this process, and you will be done in no time!
Step 1: Place your bike so that it is at the most horizontal position, and the chain touches the ground. Make sure the bike and the chain do not move.
Step 2: Press a pin into the compatible link in the optimal location. Slide an interest or some hard item in with a hole (so the pin can fall off it) to the ground. Put the chain plate on the nut.
Step 3: At the foot of the chain plate, on one side, attach a nail or nail-like thing into the hole of the chain plate above the pin head. Hit the nail with a hammer applying all your confidence. The pin must be knocked out in the hole.
Step 4: Now carry the process backward. If you have an SRAM-type chain, you need to assemble the link and drag it to separate the pins. A chain tool can come in handy in this case.
As for the C-type bike chain, you need to hold the two chain plates together and gently lock the cramp and the chain. You are done!
You May Also Read: Why Does My Bike Chain Slip When I Pedal Hard?
Final Words
So, as you can see, it’s not the end of the world if you don’t have those special tools to change your bike chain. Just a few handfuls of household tools and a pair of sharp eyes – that’s all you need to change the bike chain. If you can follow the process explained here step by step, it’s not going to be a tough call for you at all. Make sure you are not skipping any steps!
Happy riding!

A mechanical engineer became an active blogger, and it’s James Miller. Well, the journey of his blogging started more than a decade ago. As a mechanical engineer, he started his professional career as a technical assistant in a renowned automotive industry and later joined an e-bike manufacturing company as a quality in charge. James created this site “Bikerreview” to share his decade of experience with e-bikes. He wants to help the people who are newly looking for an e-bike and doesn’t have any prior knowledge about that.
More Posts